Showing posts with label Art. Show all posts

Tuesday, August 7, 2012

Button Fun

This weekend I had some fun with buttons. And surprisingly they weren't involved in a sewing project!

It all started with this image on Pinterest:


The project comes from here, and gave me the idea to make my own variation. I didn't have buttons in the a pretty colour variation like the one above, so I used spray paint.

I started by going through my button jar (I bought a large bag of buttons at Wal-Mart for only a couple of dollars) and picking up a variety of buttons in sizes, all in a thin, circular shape. To make sure I had enough I formed them into a heart shape in the opening space of the frame.


I then took the buttons outside with my can of grey spray paint and coated them all. I had to let them try for quite some time because the humidity wasn't on my side. But once I was sure they were dry enough I took a piece of cream paper and re-shaped the buttons into a heart. The tricky part was gluing them down with my hot glue gun. I tried to first glue the button and put it back down on the paper but that didn't work so well (think hot glue on my poor fingers - ouch!) so I switched and put the glue on the paper instead and then dropped the button on top.

Here's how it ended up!


Yes, surprise, I left the red button out of the spray-painted group on purpose to add a little something special!


Happy Crafting,
PS: Here's where we link up.

Monday, June 25, 2012

Nature Art

I love spring and summer with all the greenery and flowers. This past weekend I went up north a bit to a bridal shower for a wonderful girl. As I was there I couldn't help notice the beautiful gardens and big open green spaces. I wanted to incorporate these elements in some art for my home.

I raided my weed patch garden and found some leafy stems. I glued them with white glue onto the card stock I had chosen.

Then I took the papers outside and use some white spray paint. I had used the spray paint to paint my clock here. I immediately peeled off the leaves from the paper. There was just a little white glue residue left on the paper, which dried clear. I let them dry over night and then they were ready. Aren't they perfect for bringing some nature inside?

Happy Crafting,

PS: Here's where we link up.

Thursday, June 14, 2012

Alphabet Fun

Recently I've been having a lot of fun playing with my Adobe products, but mainly Illustrator. Now, I am by no means an expert, I only learned a little bit about them in school, but half the fun is trying things out and seeing how all the different tools and buttons work. The best part? If I make a mistake the trusty 'undo' option is always there!

So today I'm going to show you how to make some personalized alphabet art. I saw this a while ago, I forget where now, and the main idea was to do it for a nursery. But I think if you choose the right fonts and the right colours you can class it up enough to hang right in your living room!

To start with, choose a font that you like. Make you especially you like it in the letter you are going to use. I suggest using the first letter from either your first or last name.
But instead of outlining it in black, change the stroke line to white. Make sure you are using white and not just the blank, no-colour option. Also, make sure you use a large font to use up most of the space on the page (I used Myriad Bold at 581 points).

The next step is type out the alphabet on top on your large letter (I typed mine out at a 24 point size). My help hint is to type it out once, copy it and then paste multiple times until you cover the entire letter.
To make it all a little fancier, picked out the letters in your name and made them a different. And then just type out 'is for _____' below ( I did mine in Trajan Pro at 50 points).


Then export your project as a jpg and save it on your desktop. Now we're going to move over to Photoshop. Open your .jpg in Photoshop and take out the eraser tool. Using the white lines of your large letter, erase all of the excess small letters.


Just take it slow and steady, pausing a lot to save your project. Then, when your done erasing, you should have a perfect main letter, and an art piece completely personalized to you!


 I know a lot of people don't have these programs, so maybe you could use programs like Word? I may try it out and see what programs could be used to make this project that most people have.

Happy Crafting,

PS: Here's where we link up.

Monday, May 28, 2012

Photo Canvas

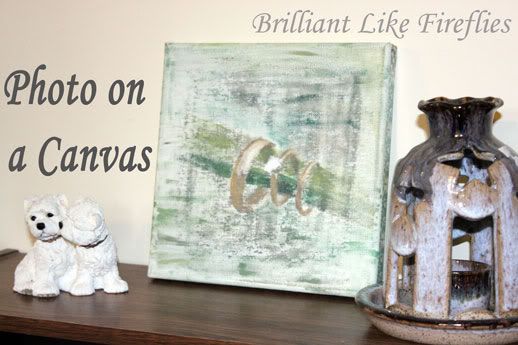
A couple of weeks ago I participated in Trading Blogs at Serendipity and Spice. I was paired up with Steph from Pumpkin Loves. In case you missed it, here's my photo canvas.

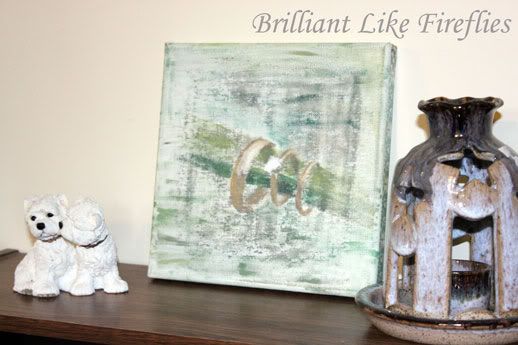
I love to make art work that looks hard, but is actually really easy. My mom gave me the idea of transferring a picture on to a canvas and then adding some paint. The end product is a beautiful piece of original art. It may look like I painted the whole thing, but I really just added a bit of paint here and there.


Step 1
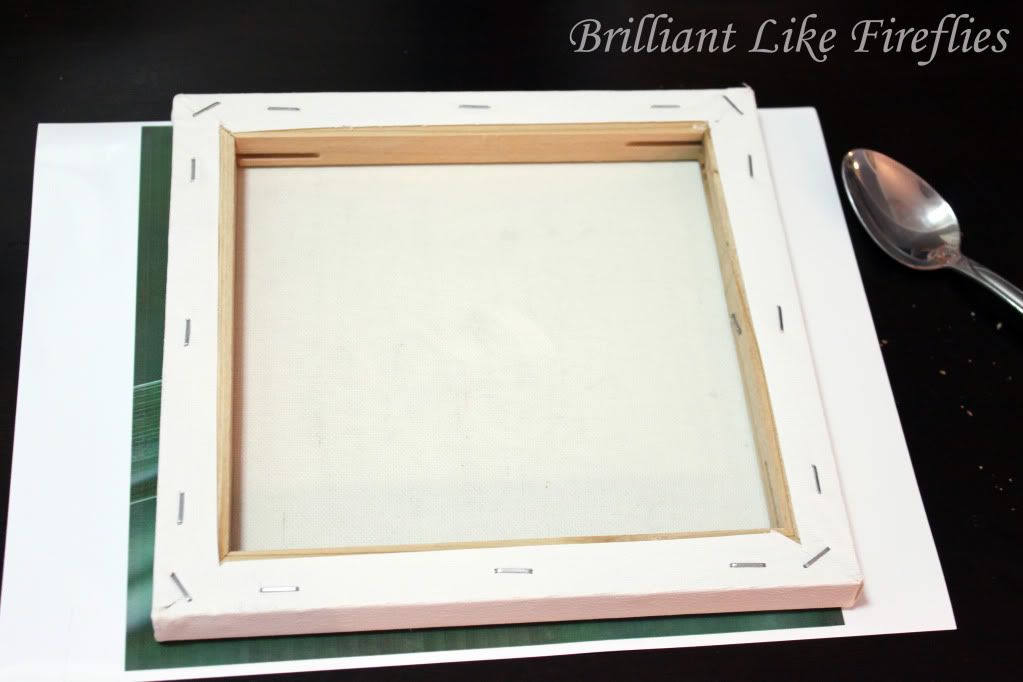
Find a canvas that is smaller than an 8.5 x 11 (mine is 8 x 8). Completely wet down the canvas. Print your picture on glossy photo paper. Immediately, while the ink is still wet, place the canvas on top of the paper. Press hard on the canvas evenly. I used a spoon, but you can use anything that is hard and flat.

Step 2
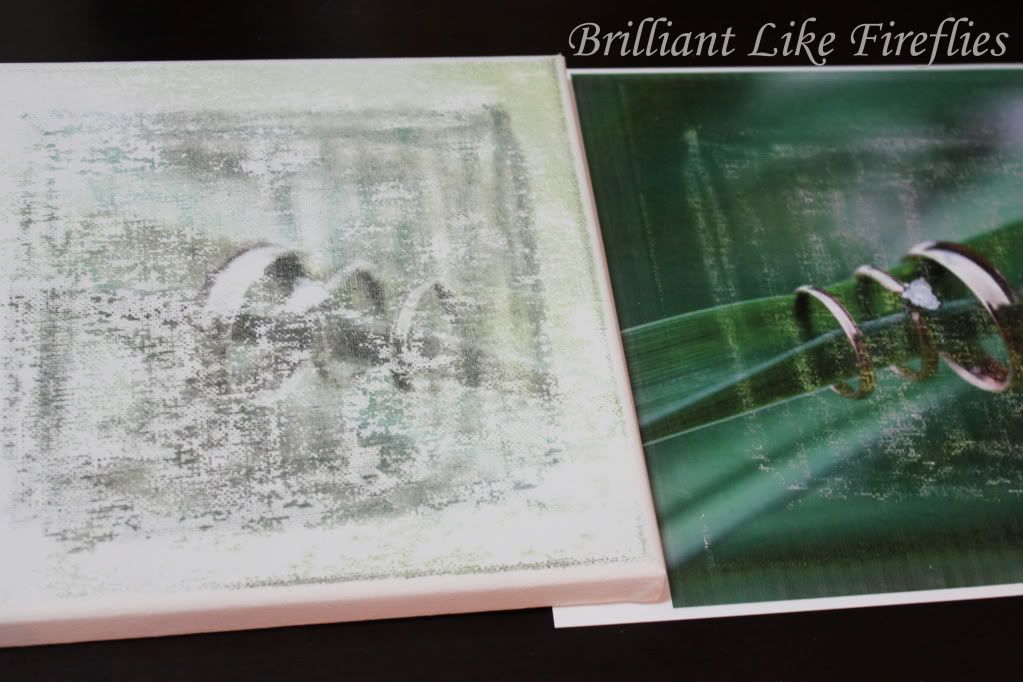
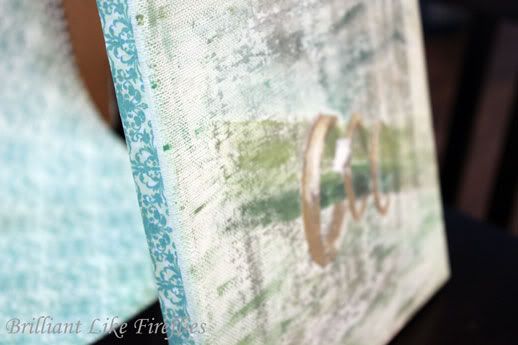
Remove the paper from the canvas. Look how beautiful this faint picture is! You could just leave it as is. But I wanted to highlight some parts and make other parts a little darker.


I got out my collection of paints and got down to work. I loved this project because I didn't have to draw anything from scratch. You just add some paint to a picture that is already there. It makes it look professional.
Photobucket
Step 3
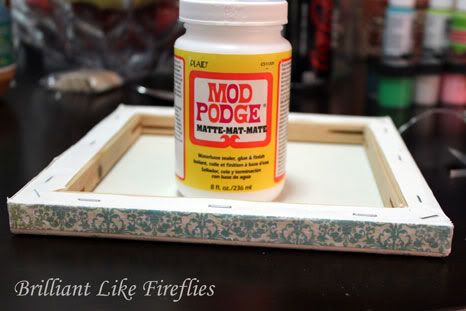
Cut strips of paper to fit the sides of your canvas. I found scrap booking paper in my drawer that matched the colours in the painting. Use Mod Podge to glue the paper on.


It was easy as that. I gave it to my husband for his office.  


Stay tuned for more this week. I took a trip to a thrift store on Saturday and I'm excited to show you some finds. Now, if I could only find some sandpaper to finish up some of my projects.....

Happy Crafting,

Friday, May 18, 2012

Pinterest Inspired Art

On Tuesday I shared with you a personalized art project I made with a canvas and some foam letters (check it out here). Since Michaels was having a 'buy one get one for a cent' sale on canvases I picked up one more which I used to make my own version of a piece of art I had pinned on Pinterest.


It turns out the artist is Jodi Fuchs, and she even has an etsy shop (check it out here). As I remember they used to sell the canvas at World Market, but now she sells the poster at her shop, or at least variations of it.

I chose to make my own with a colour scheme of blues, purples and grey, with a yellow backdrop. So I painted the canvas and let it dry.


In the mean time I used good old InDesign to make a template for the shapes, kinda 1/4 circles, but not really. To make it I drew circles of the same size and then overlapped them, so that the shape I wanted was just where the circles overlapped. When I was happy with the shape I repeated the pattern over the entire page, and then printed it directly on my coloured cardstock.


Then came the tedious task of cutting all the shapes out. It took a long time, and was by no means perfect, but it worked.

Because my inspiration was very random, I went the same way, not being picky about where each colour ended up when I glued them onto the canvas. Although, I admit, I did take the time to make a circle completely out of my favourite colour!

After all the pieces were glued down and dry and went over the entire thing with a layer of modge podge to seal it in.

The result? Pretty good. It definitely captures the essence of my inspiration with my own colour combo twist. Maybe using a Cricut or similar tool would help with getting the shapes cut out neatly, but other than that, I think it's a good amateur art project.


Happy Crafting,


PS: Here's where we link up.

Tuesday, May 15, 2012

Personalized Canvas Art

Over on Pinterest I have plenty of art inspiration pinned that I plan to make my own versions of, so I finally got the time to tackle one. I chose to replicate this, with my own quote, or rather, Bible verse.


My inspiration came from Not on the High Street, and costs about $500, but I made mine for about $20.

I picked up most of the supplies at Michaels, including a 12x12 canvas, the letters and paint. I found paintbrushes for cheep at the dollar store. Originally I was going for small wooden letters, but couldn't find some small enough, but I did find small foam letters - Score! It was especially nice because they were basically like stickers, so all I had to do was peel off the backing and stick them on the canvas, using a ruler to keep the words moderately straight.


The Bible verse I chose is Psalm 139:14 "I praise you because I am fearfully and wonderfully made."

Then I used of mix of light blue and white paint to cover the entire canvas. It turned out pretty well, the font of the lettering isn't exactly what I would have liked, but it works. The main thing I like about this project is that anyone can do it, with whatever quote they want.


Happy Crafting,

PS: Here's where we link up.

Friday, May 4, 2012

Childhood Bulletin Board

When my sisters and I got our own rooms we all got a desk and a bulletin board. We were so excited to have grown up stuff and loved to sit at our desks doing homework, crafts, and journalling. I took my desk to college with me and had it for the first couple years of my marriage. The desk, however, started to get worn and tired from moving so much. It also didn't fit into our new teeny, tiny apartment. So, a trip to IKEA was in order. The hubby and I found the perfect desk for our space.


I still wanted to use the bulletin board, but it just didn't fit into the decor any more. I set to work looking for the perfect way to spice it up. I thought a piece of fabric over the cork board part and a coat of paint on the frame would revamp it. You know I can't sew from when I made my door hanger, but I can staple.

I have to admit that I called on Mr. Firefly to help me take apart the bulletin board. It was stuck together! I thought it would be a simple matter or taking out a nail or staple, but this was not the case. Check out what Mr. Firefly found when he finally managed to get the corner apart!


There was a huge piece of metal that went through the whole piece of wood. I'm glad we were able to get it apart and slide out the cork board by just opening one corner. I then cut the fabric and started to staple it on just as you would upholster.


I know it didn't need to look perfect because it was just going back in the frame. But it was easy to do and I wanted it to fit back nicely. I painted the frame and nice white to go with the polka dots.


I then put the fabric-covered cork board back into the frame. Voila! A beautiful bulletin board that fits in our little tiny office. I love how it turned out, but I thought it needed a little something. I have a billion white tacks, but they are boring and hard to grab. I found these cute brads at Hobby Lobby for $2.

I cut off the ends and super glued the tacks to my fingers the brads. They work perfectly on my new bulletin board.

I'm really happy how it turned out. Just in time for me to go back to school next week.


Now we just need a nice desk chair to go with our great desk area. I would also love to paint a different colour on the walls. Too bad we can't in a rented space.

Happy Crafting,
Kristin

PS: Check here to see where we link up.

Thursday, April 19, 2012

Glass Etching

Remember the bottles filled with candy at the Peep Anniversary Party? Here's how I made them.
But first, some quotes to start off the day.

 I think you know where this is going. I love glass etching. I think it is amazing and beautiful. So I went to Michael's to find what I needed. I found this.
Maybe I should have read it better, but the price was right and I was in a hurry. So off I went. The directions seemed different than what I was used to. I was amazed that it didn't say it was harmful to your skin or that you should wear gloves.
I used some old frappuccino bottles.
I love these drinks and the bottles look very cute too. Here's a little tip for getting off sticky labels. Fill up a sink to cover the bottle and pour in a good amount of fabric softener. Allow to soak for a bit and then, when you come back, the label will be much easier to take off. You'll also be able to get the sticky glue off the bottle.
Now I set to work on the "etching." It took a couple of coats to even show up and you have to wait about an hour in between each coat. It took a little while. This is the end result.
The lines are crooked. I didn't have any painting tape, so I used packing tape. That was a big mistake. It was impossible to get it straight and perfect. I don't really care for how it looks, but it did the trick for our Peep Party.
I am now on the hunt for real etching supplies. Hopefully I can find something good and Mr. Firefly will let me etch our drinking glasses. I have so many ideas!
Because this project didn't turn out I thought I'd share with you some pictures that made me happy after the fiasco.
Merlin loves to help me out. Here he is helping me testing the lighting in the light box. Sometimes I take a while and he just falls asleep. I don't mind because he's just so cute!

Happy Crafting,
Kristin

PS: I linked up here.

loving this crazy life Somewhat Simple shabby creek cottage Beyond The Picket Fence The Taylor House the Grant Life
Related Posts Plugin for WordPress, Blogger...