Showing posts with label Budget Friendly. Show all posts

Thursday, June 28, 2012

Cupcake Pencil Toppers

I love bright summer colours and using felt is a great way to utilize those wonderful colours. Today I am going to show you how I made cupcake pencil toppers
I cut out a little cupcake template on white paper and then a rectangle a little bigger than the base of the cupcake. I chose to cut out the cupcakes purple, pink, and blue, while I did the base a nice brown. Make sure you cut out two of everything for each pencil topper.
My first step was to glue sequins onto the cupcakes with some white glue.
All I had left to do was sew the brown base to the cupcakes and then sew two together to make the topper.

We wish you all a happy long weekend! Stay tuned next week for our Canada Party and some other great projects we have been working on.

Happy Crafting,

PS: Here's where we link up.

Friday, June 1, 2012

Glass Magnets

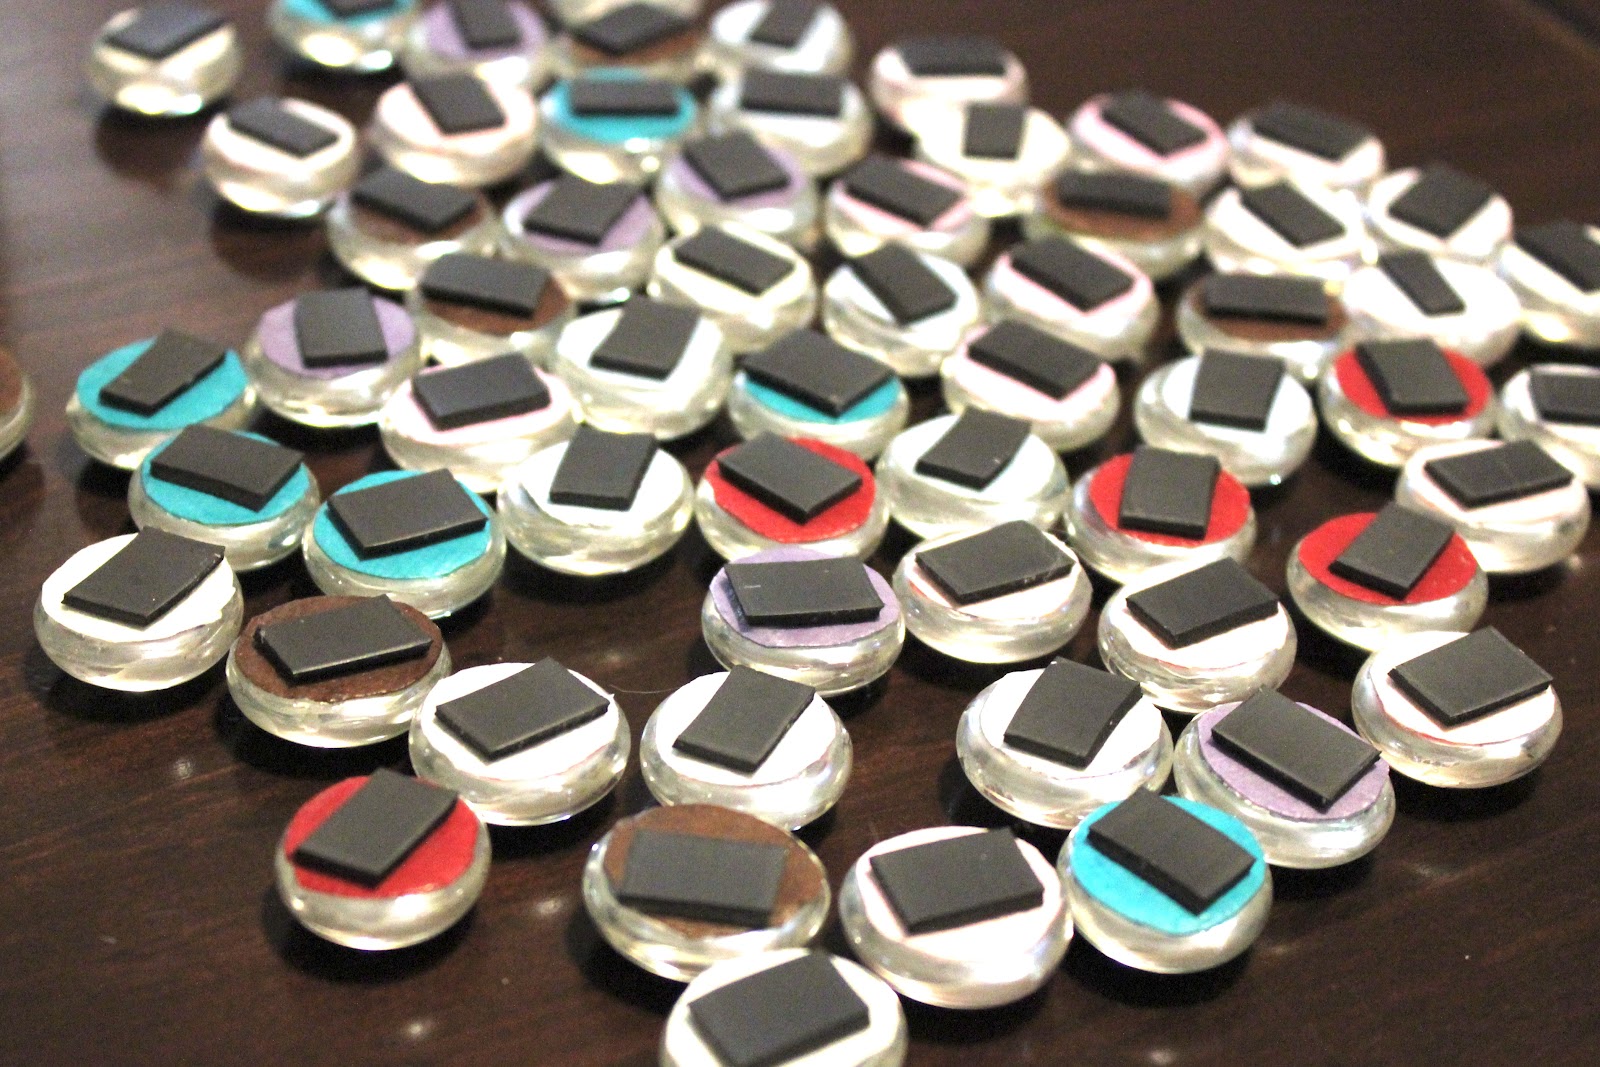
I love magnets, but the cute ones are always so expensive. I decided it was time to make my own. I headed out to my local Michael's and starting looking for what I could use. I found some glass pebbles for $2.99. I knew these were exactly what I was looking for.

I then found some fun scrap booking paper that had small patterns. I didn't want to use patterns that were too big because I was cutting out such small circles.

I sat down to some home decorating shows and started tracing the pebbles on my paper and cutting out the circles.

Then I took out my Mod Podge and glued the circles to the back of the pebbles. After they dried I trimmed off the extra paper that hung over some of the edges and put on a extra coat of Mod Podge to the back.

The last thing to do was to attach magnet strips. I chose to go for a cheaper option and not get the super magnets. They stick to the fridge fine, but they may not be able to hold big papers all by themselves.

Aren't they pretty?

These turned out amazing!


Happy Crafting,

Tuesday, May 29, 2012

Big Girl Mobile

I love to make crafts for my adorable niece. When my sister started talking about her plans for a big girl room for my niece my mind started working. I thought of the perfect big girl mobile to hang in her room.
My inspiration come from two place. First, when Courtney and I were shopping at Pottery Barn Kids we saw this beautiful mobile.
Pottery Barn Kids

And second, I found this beautiful picture on Pinterest.

Style Me Pretty
These mobiles were both perfect because they are feminine and bright with natural elements. It was also important that the mobile wasn't babyish and could be with my niece as she grew up.

I started my going for a trip to a local thrift store. I found the perfect lamp shade. I was worried that it might be too tiny, but I think that it ended up working for my project.
After I removed the fabric from the lamp shade I saw that it had lovely fabric wrapped around the top and bottom circles. I decided to keep this on my mobile.
I found a perfect flower punch for the mobile and punched out yellow and cream flowers to hang from the lamp shade.
Mr. Firefly had the great idea to hang the mobile from the tripod. This helped me as I put the flowers on the mobile. I used a needle and thread to attach the flowers to the lamp shade. I also got some glue and glued on some fake flowers to the lamp shade.
This was so easy and looks very cute. The lampshade cost $2.99, the flowers were $5.99 and I only used half of them. I was lucky to find some scrap paper for the flowers. This project couldn't have turned out better. 

Happy Crafting,

PS: Here's where we link up.

Friday, May 25, 2012

Flower Napkin Ring

Finally! It's Friday! It's been a long week for me with a bunch of assignments and a busy time at placement. I'm so glad it's finally Friday and that I have a whole weekend to look forward to. That is, after my first test today.
It's been a while since I've posted a craft for you to do with your kids. Here's a great idea I got from one of my classmates. Her daughter had made this beautiful craft for her for Mother's Day. I thought this would be great for a spring or summer table setting.

Here's what you need:

  • Three different colours of felt
  • Scissors
  • Marker
First, you need to cut out a long piece of felt that looks like a bone. The age of your child depends on what he or she may be able to do. 
Next, you need to cut out two flowers, one smaller and one larger. Then, cut a small hole along the centre of both flower and on one side of the bone.
The last step it to piece it together. Fold the bone in half. Thread the two flowers onto it. Then stick the one side of the bone into the side that has the hole. 
You have just made a very easy, yet beautiful, napkin ring.
They look beautiful in a place setting. 
Now that I'm in school I have to share some knowledge with you. This craft will help your child's fine motor skill (cutting with scissors) and problem solving skills (figuring out how to put the napkin ring together). So why not do something fun with your child that can also help their development.

Enjoy your weekend and the beautiful weather we're having.


Happy Crafting,

PS: Here's where we link up.

Tuesday, May 22, 2012

Date Night: Indoor Camping

It's Wednesday and we're all just wishing it was the weekend. In Canada, we're sad that our long weekend is over, and in the US, you're all getting ready for a long weekend. Either way, today is not a great day. Here is idea for you tonight to spice up the day. I used this idea as a date night, but it would work perfectly for a family night too.

Over the weekend Mr. Firefly and I bought an air mattress for our camping trips this summer. We wanted to make sure that there were no holes in it so we inflated it. Then I got the great idea to gather all of my plants and candles and create an indoor camping experience. I found some marshmallows and chocolate chips to make a "trail mix" for a snack. We turned on a movie and had a free date night.

I would love to do this when we have kids. I would make these.

These cute pup tents are from Lindsay and Drew. They made them from flat sheets, wood, and PVC pipes. I'm sure they would be a great hit with children. 

I can't wait to share some more fun "date nights" that cost next to nothing.

Happy Camping,

PS: Here's where we link up.

Sunday, May 20, 2012

Child Adirondack Chair

Happy Victoria Day!

Here in Canada we're relaxing with a nice long weekend. I hope you are enjoying yourself. Today I have something great to show you today.

When I was at my parent's last week for Mother's Day, my Dad saw this cute little chair across the road. It was set on the curb, ready to be picked up by the garbage truck. I hurried over there and quickly saved it from destruction. My Mom has a few adirondack chairs by the pool and I thought my niece would love one that was just her size.

I grabbed some sand paper, Apple Red spray paint, a paintbrush, and some grey acrylic paint. I started by sanding down the chair, wiping it down with a damp cloth, and then spray painting it.

I wanted to add a little something to the chair to make it pop. I found some grey acrylic paint and added some vines.

I can't believe how great it turned out.


I will take some pictures of the chair by the pool when I go to my parents' next. I think my niece will love having her own chair to sit on.

Happy Crafting,

PS: Here's where we link up.

Wednesday, May 16, 2012

Alma mater Notebook Redo

As most of you know I've gone back to school. I have a BA in psychology and haven't been able to find work that I love, so I've gone back. I am now going to my Dad's alma mater, Seneca College. I am taking Early Childhood Education in the hopes of opening my own daycare. My dad was very excited that I chose to go to his school. He still had a great notebook/folder from his school days that he gave to me.

I love that I have something of his, but it was looking a little rough.

 I took some baking soda and water and scrubbed it clean.

I then printed out a Tinkerbell pumpkin template from here.

I thought that nail polish might stick better to the notebook. I was very careful, trying to stay in the lines. It didn't work on all the sides, but I love how it turned out!

Now I'm all set to take notes.


Happy Crafting,
Kristin


PS: Here's where we link up.

Monday, May 14, 2012

Family Cluster Necklace

Happy Mother's Day! I hope you all had a wonderful weekend. For us, the sun was shining and the birds were out... a true spring day. It was gorgeous and so great to spend the day with my Mom.
Both my mother and my mother-in-law are amazing mothers and I wanted to give them a present that would recognize that they are wonderful mothers. This necklace is a family necklace with the initials of their children.

First I went to Michael's to search of the perfect pieces for my Mother's Day necklaces. I needed to find a flat piece that I could stamp letters on. This proved to be much more difficult that I had imagined! Eventually, I found this, and my little 1/16" letters fit nicely on it. Look here for the magnets I made with these small letters.

I then added a pearl and a blue stone to make a little cluster.

This fit so nicely and an silver chain.

I love how the necklace turned out. It is modern and simple, yet has so much meaning. I loved making it so much that I made some earrings out of the left over material.


I am sure that I will be making more jewelry!

Happy Crafting,

PS: Here's where we link up.
Related Posts Plugin for WordPress, Blogger...