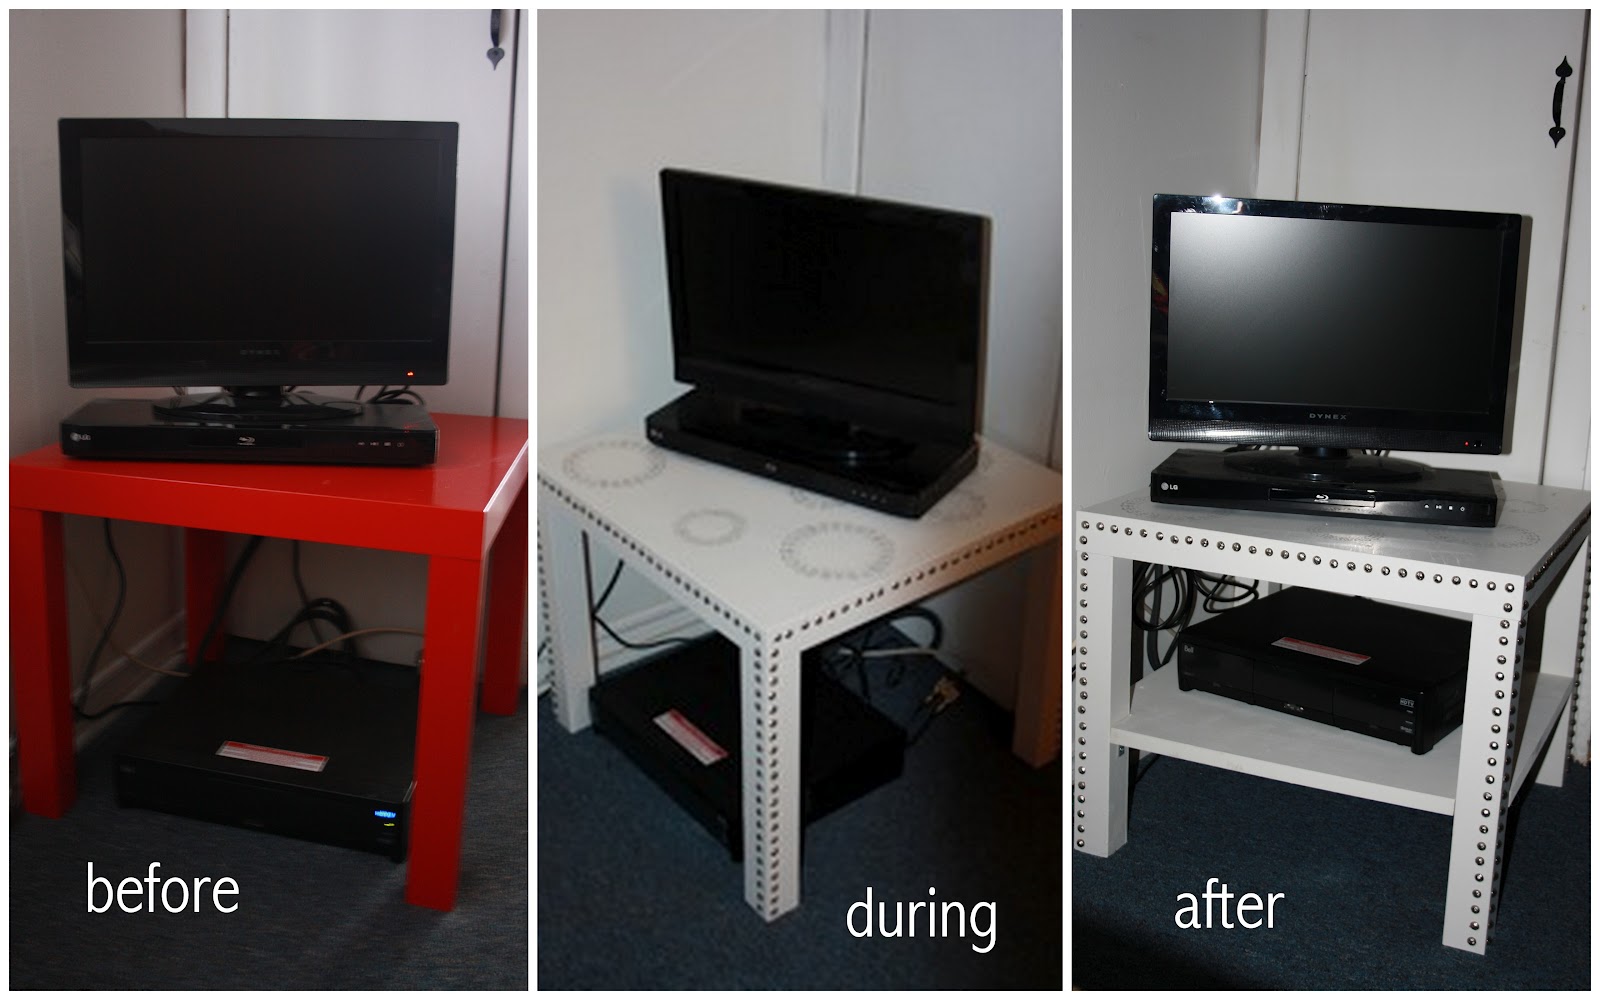
If your wondering, I used a red IKEA side table in my last apartment as a TV stand. But here I decided it needed to look a little more fancy and 'grown-up' so I painted it white, stencilled the top and used some upholstery nails to decorate it.

Once I showed my handiwork off to my dad, he came up with an idea to take it one step further - adding a shelf! I took the measurements of the outside and inside of the legs, following his diagrams below:


The measurements were, in case you are interested,
From outer leg to outer leg, 54 and 4/5 cm
From the inside of both legs, 44 7/10 cm
Then, on my next visit home, we tackled the project together. He had a spare piece of wood/particle board or something lying around that we could use. We looked it over carefully and found a good section, and then used a table saw to cut a large square (54 and 4/5 cm x 54 and 4/5 cm).


To give it a smooth finish I tried my hand at the power sander, which is actually a very peaceful activity. Finally we measured the centre of each little "gap" and screwed in some brackets which would attach on the other end to the table legs. In total we attached four brackets, one for each leg.

My dad pre-drilled the holes for the screws in the new shelf, and then we attached the brackets and it was ready for me to take back home to attach to my table.
Luckily my measuring twice and cutting once method worked and it was a perfect fit! From there it was as simple as screwing in the brackets to the table. To do this I flipped the table upside down and put a couple of boxes in the middle of the table. Then I carefully slid the new shelf over the legs to rest on the boxes.

And finally, FINALLY, the last step was to paint the shelf white to match the rest of the table.

So there you have it, how I completely, upgraded my red IKEA side table to a TV stand with an extra shelf!


My dad pre-drilled the holes for the screws in the new shelf, and then we attached the brackets and it was ready for me to take back home to attach to my table.
Luckily my measuring twice and cutting once method worked and it was a perfect fit! From there it was as simple as screwing in the brackets to the table. To do this I flipped the table upside down and put a couple of boxes in the middle of the table. Then I carefully slid the new shelf over the legs to rest on the boxes.

And finally, FINALLY, the last step was to paint the shelf white to match the rest of the table.

So there you have it, how I completely, upgraded my red IKEA side table to a TV stand with an extra shelf!
Happy Crafting,